Category: wordpress

  • PHPCode Sniffer + Sublime on windows

    PHPCode Sniffer + Sublime on windows

    Things you need for:

    1. cmder
    2. composer
    3. Sublime Text 2/3

    We are going to install using composer, because it will automatically install related packages. So no need to do too many manual stuffs.

    Step 1: Open “cmder” and run following command

    composer global require "squizlabs/php_codesniffer=*"

    This will install php code sniffer into your system.

    Step 2: Now run following command into “cmder”.

    composer create-project wp-coding-standards/wpcs --no-dev

    This will install and register WordPeress coding standards into code sniffer.


    Now we will integrate the code sniffer into sublime text editor. You will need package installer for that. You can install that from here

    Step 3: Open Sublime Text editor and press ctrl+shft+p. You will get the textbox into editor. Type “install package” into that and press enter and wait for a while, don’t change the window.

    Step 4: After a while you will again get a textbox. Type “phpcs” and you will get the result and click on “phpcs” and wait. This will install code sniffer package for sublime.

    Step 5: Go to “Preferences->Package Settings->PHP Code Sniffer->Settings-Default“.

    Step 6: Add “phpcs_executable_path” as shown below.

    "phpcs_executable_path": "C:\\Users\\YOUR_USERNAME\\wpcs\\vendor\\bin\\phpcs.bat",

    Step 7: Save the file and restart sublime.

    That’s it….!!!!!!! Code sniffer is integrate with sublime.

    To check if it’s working or not, open any PHP file and “right click->PHP Code Sniffer->Switch coding standards” and chose any coding standard which you want.

    After that again “right click->PHP Code Sniffer->Sniff this file“. You will get some error according to your chosed coding standard.

    So that’s all for now. If you have any question, then write down into comments. I will try to answer those questions.

  • WordCamp Mumbai

    WordCamp Mumbai

    Whooaaaaaaaaa…!!!!!!!!!!!! Mumbaaaaaaaaiiiiiiiiiiiiiiiii……………………………………

    Mayanagari……..

    This was my 2nd WordCamp and it was at Mumbai. This WordCamp was like medicine for me as I had some problems in my personal life.😉 I was back to work after 10 to 15 days and that weekend there was WC Mumbai. So it helped me a lot to get refresh.

    Let’s start with the journey.

    We have started our journey from OLA cab with Siddharth, Anto and Bharat (BNAP) for a Pune railway station. We booked a ticket for Mumbai and after 3 to 4 hours journey we reached at the venue. Mumbai was hot. I am talking about weather guyzzzz. 😉 But our venue was quite cool.

    So after reaching at the venue, I told my name “Bhargav” at the registration table. And there were other Bhargavs too. So they asked my surname so I told my surname “Bhandari” to the person at the table. So he was searching my I card, but he got some other Bhargavs like whatever card he got, he read the name from that I-card “Bhargav Mehta” ….. He got some other bhargav’s I-card. During collecting my I-card, one girl beside me was smiling whenever that person called my name. I don’t know why? 😕

    After collecting the stuff from the registration table I went inside the college and the atmosphere like woww !!!!… I saw our rtCamp table and went there and made a mark of the rtCamp logo on my hand and started exploring the WordCamp and met one interesting person. She was at just right beside our table. I forgot her name but she was nice. The way she was explaining the thing was damn good. And I must say she was the only interesting person I found on the first day.

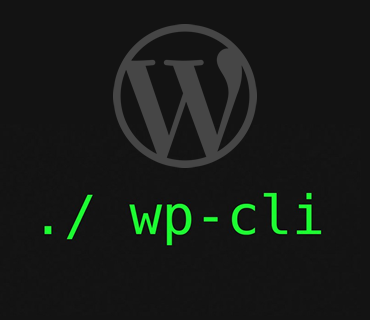
    Then after I attended a couple of sessions. The auditorium was huge and I liked it the most. My favorite sessions were like WP-CLI session and our boss Rahul Bansal’s “PHP in WordPress way”. I found that very interesting and I learned something from these two sessions only. At the first day, I saw my x-boss during lunch. So I went to meet him. We talked for a while and then I rushed to the queue for lunch as I was so hungry.

    At the end of the day, I decided to go to my hometown. So I went to Mumbai Central and took the train for that. I decided not to spent a night in Mumbai. I wanted to go home and came again to the next morning.

    At the next morning, before going to the WordCamp, I visited the Mount Merry church as I always wanted to visit that place. That was my first visit and I feel so good at there. I will definitely visit that church again. I shared some pics of the church on my Instagram profile. You can see those at here. After spending some time at the church, I went to the venue and at that day only I was waiting for Nirav Mehta’s session. And it was damn good, so inspiring. After that, I went for getting the WC Mumbai t-shirt and a mug. And I got that. 🙂

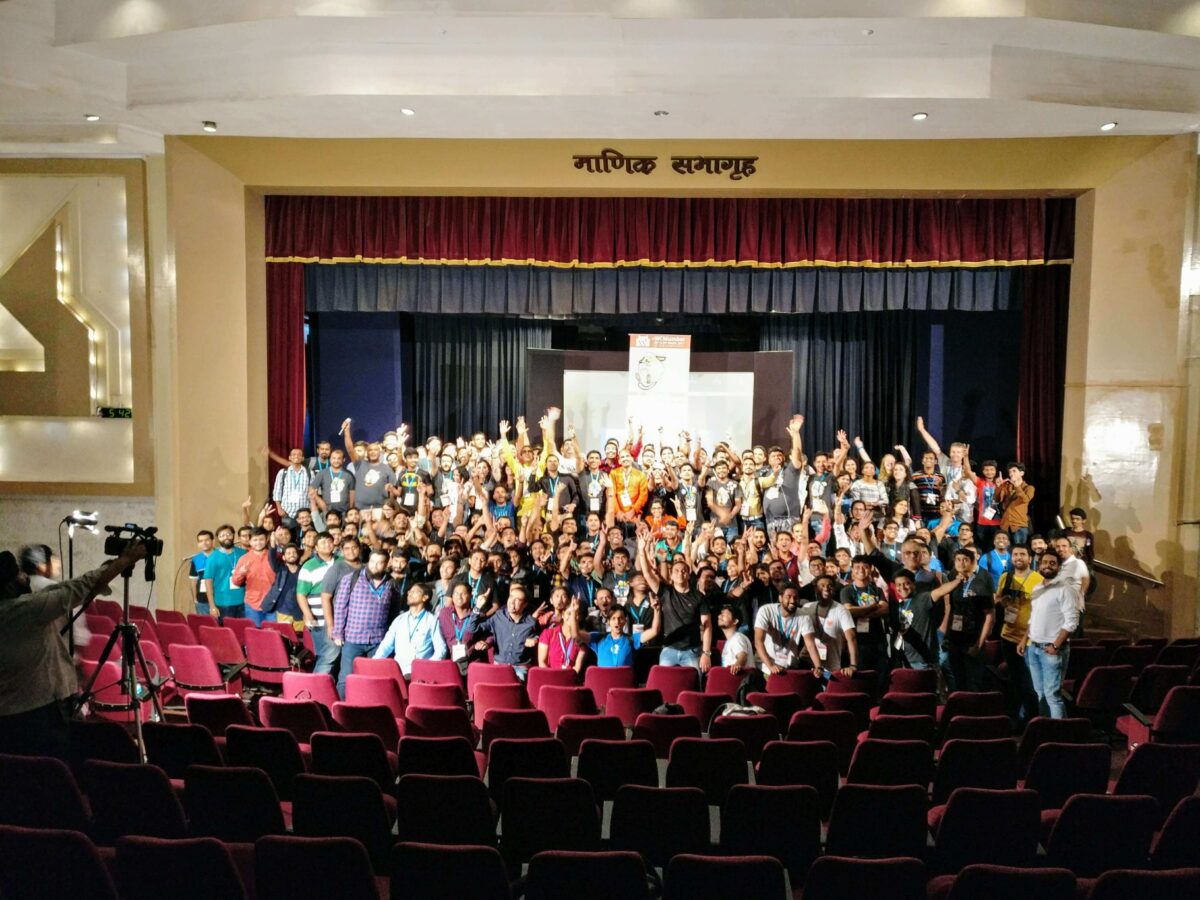
    At the end of the WordCamp, a group photo session was there as always. You can see at the top of this blog. After that, I took an extra t-shirt for my friend, Amit. And he was happy to see that. So our train was from Mumbai at around 9 pm and we have 3 hrs. So I decided to go to Bandsatand with Siddharth and Naveen. We had a great time at there. Then we went to station for getting back to Pune. It was an adventurous journey. Why?  That you will know in my next blog. 😛

    One thing I always wanted to do was walk at the Marine Lines. I had a chance but I missed it as I went to my hometown for a night stay. So next time, I will definitely do this.


    That’s me and Yahil ( left ), attending a session and having a selfie.    

    Me, Naveen(center) and siddharth(left) at Bandstand.

    So that’s all. See you at the next bolg. 🙂


  • Install wp-cli on windows

    Install wp-cli on windows

    WP-CLI is a set of command-line tools for managing WordPress installations. You can update plugins, configure multisite installs and much more, without using a web browser.

    So I am going to tell you short, simple and easy way that how to use wp-cli on windows system.

    Step 1: Create folder named “bin” at location “C:\Users\USERNAME\bin”.

    Step 2: Download wp-cli.phar and put this file into “bin” folder ( created in step 1 ).

    Now let’s go to next step. Yehh!!!!! still some steps are remaining. So now we will create a bat file for wp command.

    Don’t know to create bat file ? Don’t worry it’s ok if you don’t know something… See this for how to create bat file.

    Step 3: After creating that file rename it to “wp.bat” add the following code into that file.

    @ECHO OFF
    SET BIN_TARGET=%~dp0/./wp-cli.phar
    php "%BIN_TARGET%" %*
    

    Step 4: Now go to Control Panel -> System -> Advanced System settings ( left sidebar ) and click on “Environment variables” and then chosse “PATH” from user variables and click edit.

    systemsettings          ->         uservariables                                                                         variables


    Step 5: Now add two paths into Variable values at value. 1st is PHP path ( where your php is installed. ). In my case it’s ;D:\xamp\php and 2nd is your wp-cli path ( we created in step 1 ) which is ;C:\Users\bunty\bin.

    Final value will be like this:

    C:\Users\bunty\AppData\Roaming\npm;C:\Users\bunty\AppData\Roaming\Composer\vendor\bin;D:\xamp\php;C:\Users\bunty\bin


    Now we will check if it works or not. But before this you need to restart your PC and follow next steps.

    Open cmd ( hopping that you all have different method to open it… ) and go to “C:\Users\USERNAME\bin” location by the following command:

    cd C:\Users\USERNAME\bin

    and after that run following command 

    php wp-cli.phar --info

    Hope you will get output something like this:

    cmd

    Awwwww…!!!!!! feels good right….!!!!!!!

    Feeeeewwww…!!!!!!! this is too much right..?!!!! But cooool, you did it. Yes, you have completed the installation now. the only thing is need rightnow is just test it. To check and see whether WP-CLI is set up properly, execute the following line on the command prompt:

    wp --info

    And you will get same result as step 2 like this:

    wp-cli

    Finally it is done. Now you can use wp-cli commands. Now in cmd, just go to root of your WP installation and run following command:

    wp plugin install bbpress --activate

    And tell me what happens…..? I am not gonna tell you..!!!!! You tell me…..!!!!!!!

    That’s it…